Many homeowners consider replacing their existing lighting with recessed lighting, but assume it requires major ceiling changes or planning for it during new construction. In reality, there is a way to install recessed lights in a finished home with far less disruption. That solution is called retrofit recessed lighting. It allows electricians to upgrade or add recessed lighting fixtures to existing ceilings, creating a cleaner look and more consistent light without major demolition.
This article explains what retrofit recessed lighting is, how it works, and how it compares to new construction recessed lighting. You will also learn about the different retrofit options available, such as inserts with LED technology, and the factors that influence installation cost. By the end, you should have a much better understanding of whether this type of lighting upgrade makes sense for your home.
What Is Retrofit Recessed Lighting?
Recessed lights, often referred to as can lights, are installed directly into the ceiling so the trim sits nearly flush with the drywall. Unlike traditional fixtures that hang into the room, recessed housings are concealed above the ceiling surface, creating a streamlined appearance and directing light downward in a controlled pattern.
In new construction, recessed lights are mounted before drywall is installed as part of the framing process. With retrofit installation, the fixtures are designed to fit into the existing structure without major demolition. The goal is to achieve the same appearance and improved performance without opening up large sections of the ceiling.
How Retrofit Recessed Lighting Works
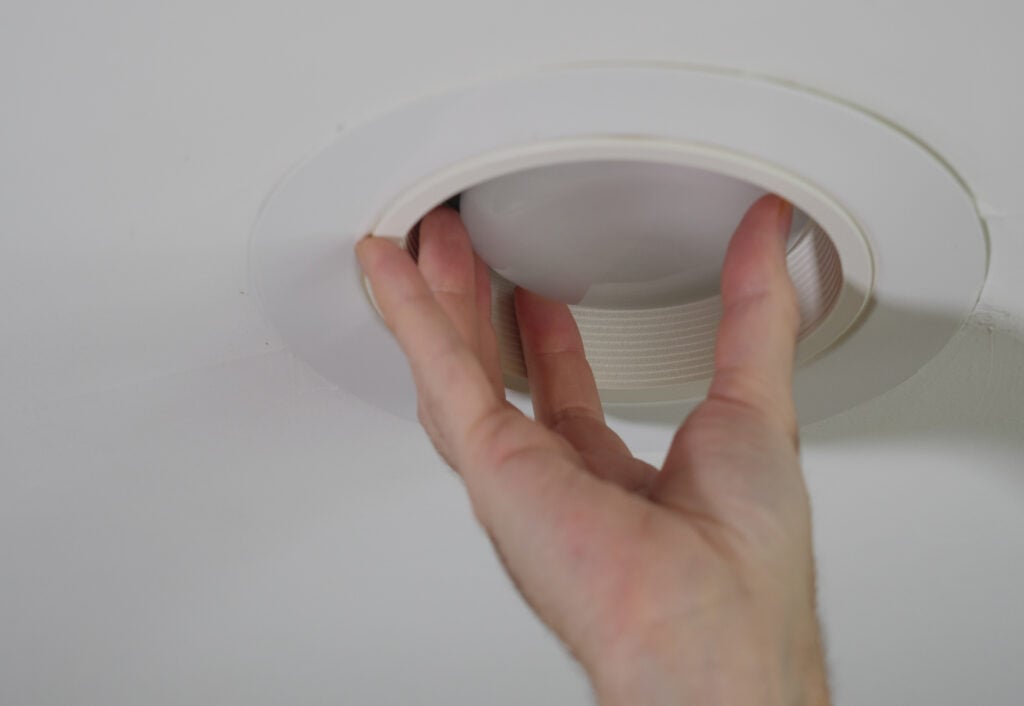
Retrofit recessed lighting is installed directly through the finished ceiling surface. An electrician cuts a properly sized opening in the drywall, then accesses the branch circuit serving the room. If a nearby power source is available, the new fixture is tied into that circuit inside an approved junction box. If not, new wiring is run from an existing switch or power source to supply the fixture. The housing is then inserted and secured using built-in clips or mounting brackets that grip the ceiling material from above.
Because retrofit recessed lights are engineered to support themselves in drywall, they do not require access to ceiling framing. The result is a secure, code-compliant installation that improves your lighting systems’ overall performance without the hassle of a full-scale remodel. There are two primary types of retrofit solutions.
Retrofit LED Inserts
Retrofit LED inserts are used with previously existing housing. Instead of a complete fixture replacement, the older bulb and trim are removed and replaced with a modern LED module. The insert connects to the socket inside the existing fixture and is secured using torsion springs or spring clips. LED recessed lighting inserts are one of the fastest ways to upgrade lighting quality, improve energy efficiency, and achieve a more updated look without altering the ceiling structure.
Remodel Housings for Finished Ceilings
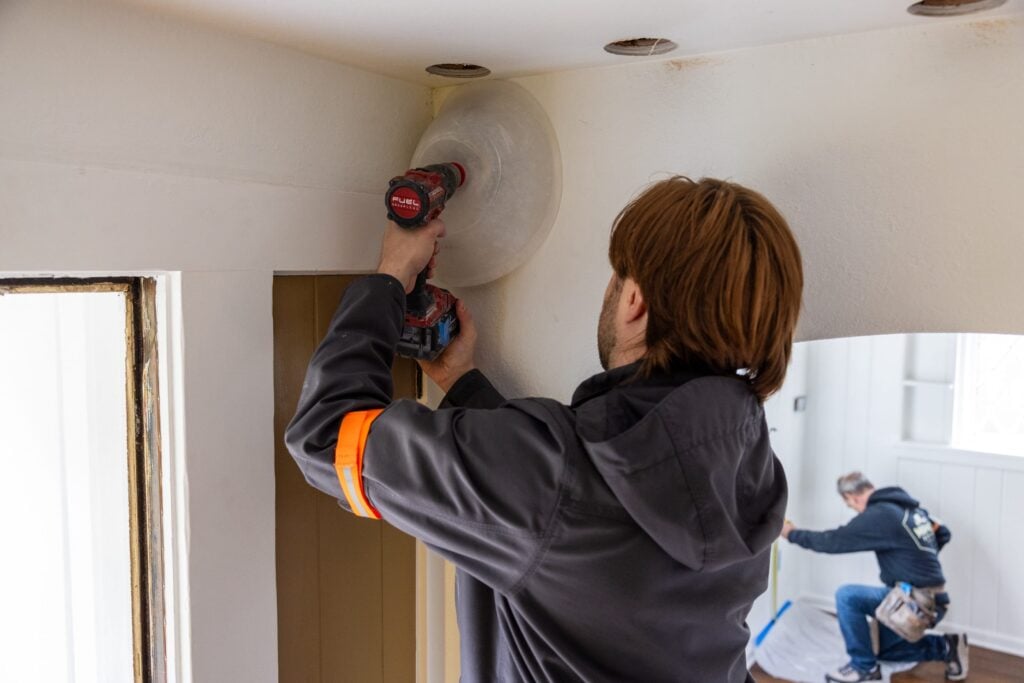
When no recessed lighting exists, remodel, sometimes called old work housing, are used to add new fixtures to a finished ceiling. Unlike new construction housings that are nailed or screwed directly to ceiling joists before drywall is installed, remodel housings are designed to support themselves in the drywall without attaching to the framing from above. After cutting a precise opening in the ceiling, the housing is inserted from below. Built-in clips expand and clamp tightly against the backside of the drywall, holding the fixture securely in place. Wiring is then run to the new location and connected according to code.
The Benefits of Retrofit Recessed Lighting
Retrofit recessed lighting offers a practical way to modernize your home’s lighting without opening ceilings or starting a major renovation. Because the fixtures are designed for finished spaces, they provide energy savings, a clean lighting design, and minimal disruption in a way that traditional installation methods cannot.
- Minimal ceiling damage: Installed from below the ceiling, retrofit fixtures avoid large drywall removal and reduce mess during installation.
- Reduced energy consumption: Modern LED retrofit lights are significantly more energy efficient than traditional incandescent lights or fluorescent bulbs while producing better lighting for a longer lifespan.
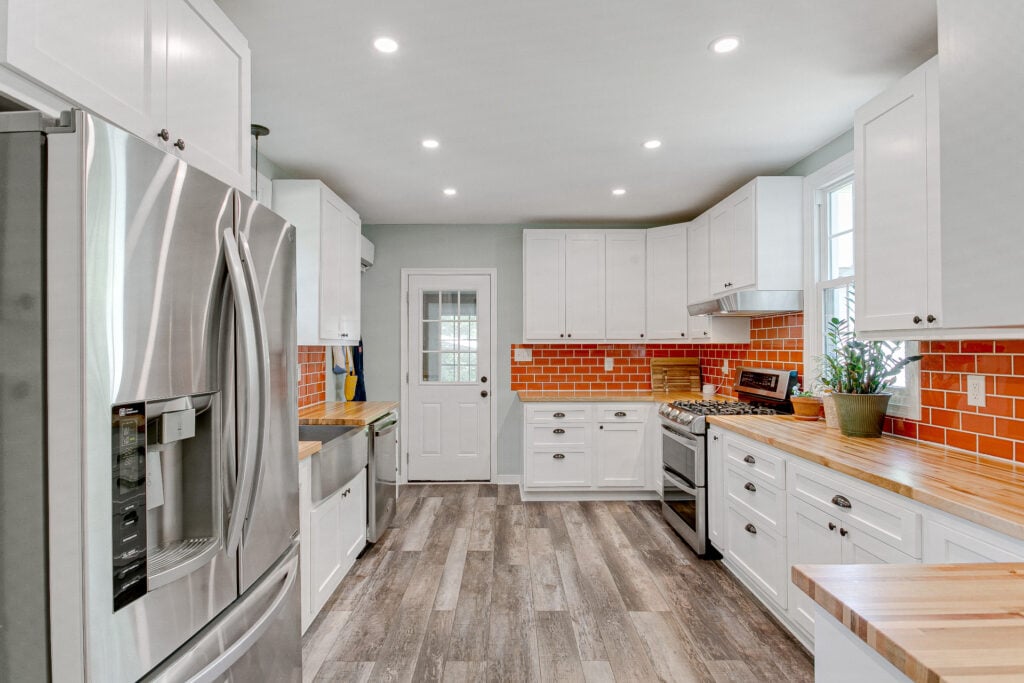
- Cleaner appearance: The trim sits nearly flush with the ceiling, creating a streamlined look that reduces visual clutter.
- Dimmable and smart options: Many retrofit fixtures are compatible with dimmer switches and smart lighting controls for better flexibility.
- Better overall light distribution: Properly spaced recessed lighting reduces shadows and improves brightness in kitchens, living rooms, hallways, and basements.
Common Mistakes When Adding Recessed Lighting
Recessed lighting looks simple once it is installed, but poor planning can lead to uneven light, glare, increased maintenance costs, and long-term electrical issues. Many problems homeowners experience are the result of layout or installation mistakes made at the beginning of the project.
- Installing too few lights: The wrong number of fixtures in a large room can create bright spots with dark corners. Recessed lighting works best when evenly spaced to distribute light across the entire area, with dimmers allowing you to adjust brightness to create the desired ambiance based on your personal style.
- Poor spacing and placement: Placing lights too close together can cause glare, while spacing them too far apart leaves shadows. Fixtures should also be positioned carefully around cabinets, islands, and walls to avoid casting unwanted shadows.
- Ignoring light beam spread and lumen output: Not all recessed lights produce the same light pattern or brightness. Beam spread refers to how wide or narrow the light is distributed from the fixture. A narrow beam creates a focused spotlight effect, while a wider beam spreads light more evenly across the room. Choosing the wrong beam angle or brightness level can make a space feel dim, uneven, or overly harsh.
- Mixing color temperatures: Combining warm and cool LED tones in the same space can make lighting feel inconsistent. Selecting a consistent color temperature throughout a room creates a more polished result.
- Overloading an existing circuit: Adding multiple recessed lights without evaluating circuit capacity can cause nuisance breaker trips or long-term wiring stress. Load calculations should always be considered before installation.
- Using fixtures not rated for insulation contact: Some recessed lights are not designed to be covered or surrounded by attic insulation. If insulation touches the wrong type of fixture, it can trap heat and create a fire risk. Choosing lights that are rated for direct contact with insulation is especially important in insulated ceilings.
Upgrade Your Home With Professional Recessed LED Lighting Solutions
Retrofit recessed lighting can dramatically improve how your home looks and feels, but the quality of the installation matters just as much as the fixtures themselves. Proper spacing, load calculations, secure mounting, and code-compliant wiring all play a role in how well the system performs over time.
At Mirsky Electric, we specialize in residential electrical upgrades for Seattle-area homeowners, including retrofit recessed lighting installations and full recessed lighting layouts for remodels. Whether you are replacing outdated fixtures or adding new lights to a finished ceiling, our team focuses on clean workmanship, accurate planning, and long-term reliability.
If you are considering recessed lighting for your home, get in touch to schedule an estimate. We will evaluate your space, discuss layout options, and help you determine the best approach for your lighting upgrade.


